
Just a little DIY


DIY Painted labels for kitchen jars or canisters!
Hello there!
So, I've been slowly trying to decorate and update items/rooms in our house (I'll admit, it's definitely NOT Pinterest worthy!)
I've had these canisters on my kitchen counter for a couple of years now and I was sick of them being empty! I've been wanting to make a little coffee corner in our kitchen for awhile now and I have recently discovered Rea Dunn dishes. I'm in LOVE! I know... do I live under a rock or something? I decided I wanted these to have a similar feel as those do! So I made my own! This is just a quick little DIY so have fun with it!
You'll need:
White acrylic paint
Paint brush (Preferably thin)
Printer
Plain white Printer paper
Tape
Toothpick
Scissors
Canisters or jars
So first, print out the words you're going to be painting onto your jars (make sure they fit too)
I used Google docs.

Next, cut out the words. It doesn't have to be perfect!

Now, tape the word into the inside of the container. Make sure it's pretty center and isn't crooked.

Then, paint/trace the words with your paint and let dry!

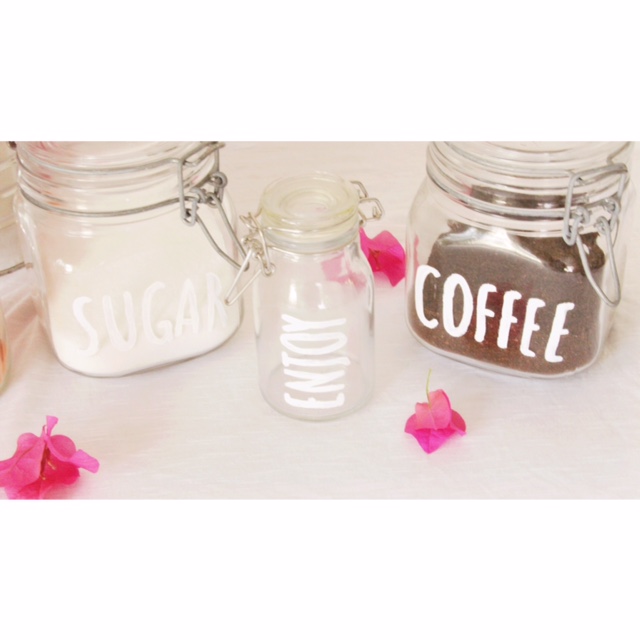
LOOK HOW CUTE THEY LOOK!
The best part is, it's not permanent! If I wanted to wash it off, I totally could!
Now I just need to make my coffee corner!


DIY PINWHEELS
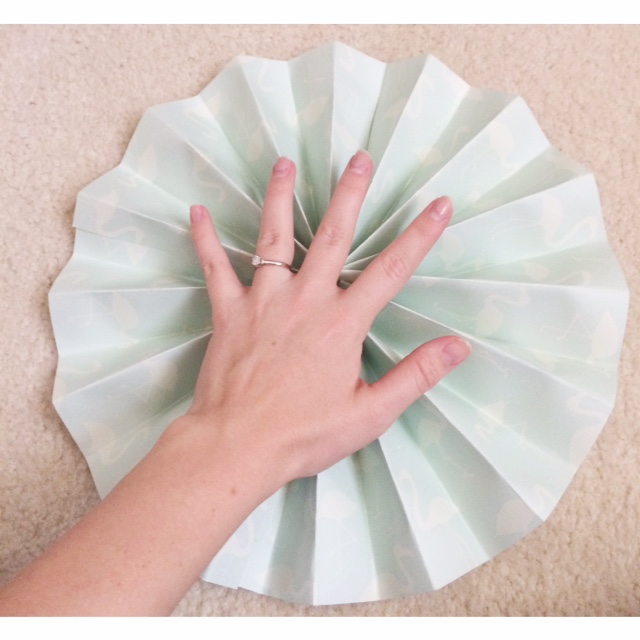
HEY GUYS! I'm just a little excited to share with you how to make these lovely pinwheels! (Okay, okay... I'M REALLY EXCITED!) These are my favorite part of Addie's room! I'll have to admit though, I had a few friends and family members make some of these! They were actually made for my baby shower and I loved them all so much that I put them in her room! It makes her room so much fun! Don't feel intimidated by these suckers, they aren't as hard to do as they look! Have fun with them, especially the paper, and send me pictures of the ones you make! I'd love to see how yours turn out! (Don't judge my nails... this mama needs to go get them done!)

Supplies:
Scrapbook paper (Two 12in X 12in pieces for the large pinwheels)
Scissors
Hot glue gun
Hot glue
Tape (optional)
& Something snazzy to put in the middle (also optional)

First, get your two pieces of paper! I'll be showing you how to make the large pinwheels so any paper smaller then 12in. X12in. will make smaller pinwheels.

Fold both pieces straight down the middle! Then, cut them both in half so that you have 4 pieces now!

Your 4 pieces should look like this.

Now, fold each piece like an accordion or like those fancy fans you used to make when you were a kid!

Now, put hot glue down the side of the fold that is facing down (as shown)

The folds should fit together just like this... if they don't, tweak them a little until they do.
(see how one side folds up and one is folding down)
Glue all four pieces into one long piece!

You should now have one long folded piece like below! You're doing great!

Now glue the two sides together so that it looks like this (like a funky lampshade ;) )

Now push (you might have to fight with it a little) the sides down as shown below.
Grab your glue gun and fill the whole middle full of glue! Be careful! It's hot! The sides will try to fold back up so hold the sides until the glue dries!

As the glue in the middle dries, you'll be able to tell if it's going to stick together or not. If it is still trying to fold up, add more glue or flip it over and glue it from the back. Sometimes, putting tape on the backside helps!


Once it dry and it's staying tight and closed, add your snazzy center piece! You can use anything you'd like! Just add some glue and stick it in the middle! (I used a fake flower on mine)

Awesome! You did it! Don't forget to send me your finished product! And check back for more DIY projects! Thanks!
(remember, the smaller the paper, the smaller the pinwheel)


Comments
Post a Comment